In the dynamic world of beauty and brow treatments, few trends have captured attention quite like brow lamination did. With the power to sculpt and shape eyebrow hairs to perfection and create fuller brows, it’s no wonder that this technique has become one of the most favorite. The allure of beautifully laminated brows is undeniable, but maintaining their flawless appearance requires more than just the initial treatment. Let’s explore the brow lamination tips and tricks from brow professionals. Join us in discovering the best brow lamination care tips that can be the game-changer you’ve been searching for!
The power of quality products
Before we talk about brow lamination tips, let’s look at the first important aspect of every beauty treatment: the tools you need to rock a brow lamination treatment. The journey to brow excellence isn’t just about technique, but it hinges on the quality of products you bring into play. Picture this: brows that are not only flawlessly shaped but also vibrant, long-lasting, and defined. The key lies in the products you choose, and that’s where a true game-changer enters the scene. Without further ado, allow us to introduce you to Supercilium – a brand created by brow professionals. The Brow Lamination Starter Kit obtains everything you need to laminate brows and lashes. Yes, two-in-one, so you can use it for both brows and lashes. They also offer certified courses for lamination, after which you will know how to do lamination step-by-step!
Discover the ultimate brow and lash transformation
Elevate your beauty game with the Supercilium Brow Lamination & Lash Lift starter kit. It tames unruly hair, creating symmetrical and full brows and the illusion of longer lashes. This starter kit includes all you need for bold brows and stunning lashes. It’s definitely our favorite Brow Lamination Kit on the market. With up to 40 treatments in one kit, this formula ensures consistent, long-lasting results that are paying back its investment right away. Unveil the secrets of step-by-step brow lamination with Supercilium. Your path to eyebrow perfection begins here.
How to do brow lamination step-by-step
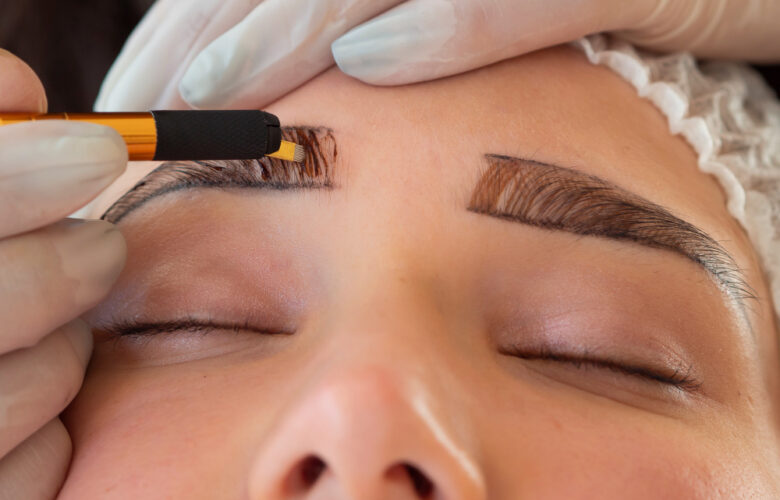
Step 1: Begin by preparing the brows and lashes for their transformation. This initial stage involves cleaning the hairs, ensuring they are free of any impurities. When performing a lash lift, you need to select the appropriate shields for the desired lash effect.
Step 2: Apply the Nr. 1 Relaxing Lotion thoroughly to the lashes. The duration of this application varies depending on the hair type. Once the treatment time is complete, gently remove the solution using a cotton swab.
Step 3: Next, it’s time for Nr. 2 – The Laminate. Set the desired processing time to allow the brow and lash hairs to fully absorb this transformative solution.
Step 4: Apply Nr. 3 – Nourishing Elixir. This essential solution not only nourishes the hair but also ensures that every trace of residue is thoroughly removed.
Step 5: As the final step, carefully remove any remaining serum, shields, and accessories. It’s time for your clients to revel in their beautiful fluffy brow and full lash look, the stunning result of your brow lamination expertise.
Insider brow lamination tips from the pros!
Ever wondered how the pros achieve those jaw-dropping, perfectly laminated brows? Well, you’re in for a treat because we’re about to spill the beans. Get ready to embark on a journey of beauty wisdom straight from the experts themselves. We’ve gathered their closely guarded tips and tricks to take your brow lamination game to the next level.
Pro Tip 1: Unlock the power of supercilium bonding serum
To begin your path to perfect brows through lamination, we first need to prepare. That’s where Supercilium Pro Cleanser comes into play. Before we introduce the Bonding Serum, meet this special cleanser for lash and brow hairs. It’s a crucial step that ensures that the brows and lashes are clean and ready for the lamination solutions.
Then, simply apply a thin coat of the Supercilium Bonding Serum to both the lash and brow hairs. By following this brow lamination tip, you’re setting the stage for success, ensuring that Relaxing Solution No. 1 can work its wonders with maximum effectiveness. It’s a small step that yields big results, transforming even the most stubborn hairs into obedient, stunning beauty assets.
Pro Tip 2: Elevate your technique with precision
Unlock a game-changing pro tip that can instantaneously elevate your lamination skills: when applying the lamination products, style the hairs at a 45-degree angle using the Supercilium Silicon Brush. This seemingly minor adjustment can make remarkable results in your final outcome. It’s way more natural than when you brush them too much up. This strategic positioning creates a dynamic flow that accentuates the brows’ natural arch, enhancing the overall impact of your lamination treatment. Embrace the art of 45 degrees – a pro secret and the catalyst for unlocking eyebrow excellence like never before.
Pro Tip 3: Embrace natural growth for fuller results
Here’s a valuable brow lamination tip to share with your clients, especially when considering what not to do before brow lamination: avoid trimming your brows for at least six weeks prior to the treatment. While it might be tempting to tame unruly brows in advance, allowing them to grow naturally serves a purpose beyond aesthetics. By giving your brows this growth window, you significantly reduce the risk of sparse brows after the treatment. Those precious hairs that might have been trimmed away hold the key to achieving fuller, more lush results during the lamination process.
Pro Tip 4: Keep them dry
When it comes to brow lamination aftercare advice, this tip is a gem: for the first 24 hours post-treatment, advise your clients to shield their laminated brows from water. It’s a simple yet crucial step to ensure the longevity of their stunning results. Encourage them to avoid activities like swimming, where their brows might encounter water. The reason? Water can interfere with the adhesive properties of the lamination product, potentially diminishing its effectiveness. Otherwise, it’s bye-bye to freshly created brows.
Pro Tip 5: Mastering the art of precision timing in brow lamination
Here’s a pro tip that’s a game-changer, especially when considering brow lamination tips: when working with Supercilium solutions during the lamination process, pay close attention to the types of hair and the timing of the treatment. It’s all about finding that sweet spot— not too short and not too long. When the processing time is too short, you might end up with mediocre results that don’t fully maximize the potential of the treatment. On the flip side, letting it process for too long can over-tame the hair with over-processed curly brow hairs as a result. The secret lies in precision timing, tailored to the unique characteristics of each client’s hair. Get this balance just right, and you’ll unlock a world of stunning, customized results that leave your clients amazed.
Pro Tip 6: How to fix brow lamination
Even with the best intentions, brow lamination can sometimes take an unexpected turn. But worry not because, with the help of Supercilium products, you can fix brow lamination gone wrong like a pro. If you’re faced with over-curled brows, gently comb through them with a clean spoolie, going against the direction of the curl. Supercilium’s Silicon Brush works wonders for this. It’ll help relax the hair and reduce the intensity of the curl.
For uneven lift, especially if one brow is misbehaving more than the other, use a clean cotton swab dampened with water and gently press down the overly lifted brow into the desired position. Be patient and precise as you guide it back to perfection. Remember, less is often more when it comes to corrections, and Supercilium’s Nourishing Elixir is your trusty companion for soothing and revitalizing the hair in the process.

Pro Tip 7: Handling common client questions with confidence
When it comes to brow lamination, clients often have questions. Here’s how to address some common ones:
Can Brow Lamination look natural?
Absolutely! Brow lamination can be tailored to achieve a natural look. We carefully customize the treatment, ensuring it enhances your brows without appearing overly styled.
Is Brow Lamination good for thick brows?
Yes! We love thick brows. Brow lamination can work wonders for thick brows. It helps to control unruly hairs, creating a polished and refined appearance while maintaining their natural thickness.
Is Brow Lamination good for thin brows?
Indeed, brow lamination can benefit thin eyebrows as well. It gives the illusion of fuller brows by lifting and shaping existing hair, providing a more defined and voluminous look.
How to get rid of Brow Lamination?
If you wish to remove brow lamination, be patient. It’s a semi-permanent treatment, and the effects will naturally fade over time. Usually, it takes 4-8 weeks to fully grow out. If you want to speed up the process, expose them to water in the first hours after the treatment since this will expedite the process.
Pro Tip 8: How to tint laminated brows? We got you!
Unlike traditional brow henna, which can be too harsh when paired with lamination, the unique chemistry of Hybrid Dye makes it the perfect partner for lamination. It’s important to ensure you remove all the leftover residue before you start with the dye process. Just like in a normal tinting procedure, the cleaner the brow area, the better the hybrid dye can penetrate the hairs and skin.
After completing steps 1 and 2 of the lamination treatment, you follow your regular tinting procedure. Once you’ve finished dyeing the eyebrows, we recommend skipping step 3 right away. This step should be skipped to avoid the risk of the color stain on the skin fading quickly. With this method, you not only ensure color retention but also set the stage for easier tint application. With your brow hairs already lifted and neatly separated upwards, tinting becomes a breeze.
Still want to know more? FREE Brow & Lash Lamination Course
Are you ready to take your beauty game to the next level? As we already said, the Brow Lamination treatment is the hottest trend in the beauty industry. Now that you know all the brow lamination tips and tricks, you can learn even more about how to do brow lamination step by step right from the comfort of your home. Find the free Brow Lamination course when browsing the Brow Lamination collection of our favorite brand. Whether you’re just starting or aiming to enhance your expertise, this course is your ticket to success. Don’t miss out on the opportunity to learn from the best in the business. Enroll today and start your journey to brow lamination perfection!
Featured Image by freepik.com